Tim Tam Cheesecake
Ingredients
Topping (decoration):
4 x 200g packets of Original Tim Tams (take one pack and chop them up for the top of the cake)
50g unsalted butter, melted
Cocoa powder (decorate)
1/2 cup cream
170g chopped milk chocolate
Filling:
2 x 250g blocks of cream cheese, at room temperature
1/4 cup caster sugar
2 x 180g blocks white cooking chocolate, melted
300mL thickened cream, whipped
200g block of milk cooking chocolate, melted
Method
Grease a round spring form pan and line base and side with baking paper.
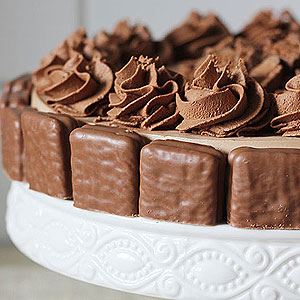
Line the side of the pan with Tim Tams.
Put the remaining amount of Tim Tams (aside from the packet you've chopped up) into a food processor until finely crushed. Add butter and process until combined.
Press evenly over the base of the pan and refrigerate.
Filling:
Beat cream cheese and sugar in a large bowl.
Beat in cooled but melted white chocolate and continue until mixture is smooth.
Fold in cream until it's just combined.
Transfer one-third of the mixture into a separate bowl.
Fold cooled melted milk chocolate into the larger amount of mixture (the 2/3s) until just combined.
Spoon white and milk chocolate mixtures alternately into prepared pan and smooth the top.
Refrigerate, covered, overnight.
Remove side of pan and place onto a serving dish.
To decorate:
Warm the cream in a small saucepan over medium-low heat and gradually bring it to the boil.
Remove cream from the heat and add chopped milk chocolate. Whisk until combined.
Pour ganache into a small bowl and cool to room temperature before placing in the fridge for an hour.
Remove ganache from the fridge and whisk it until light and fluffy.
You can use a piping bag to pipe the ganache in swirls onto the cheesecake or you can cover the entire top of the cake.
Finish the cake with a packet worth of chopped Tim Tam biscuits and dust with cocoa (optional).
*adapted from high tea with dragons in association with Tim Tam.
Credits: Kirsten
Photo Credits: Kirsten


